 Wild Earth
DIY & Repairs
Start with the fix you need. Each guide lists the supplies, steps, and a quick way to check your work.
Search this topic’s guides
Choose an example below or describe one specific item, task, or problem. Results come from the guides already on this page.
50 quick household tips
Clothes and fabric · 10 tips
- Mark the button location through the buttonhole before sewing.
- Round patch corners so they are less likely to catch.
- Use a contrasting basting thread to mark a new hem, then pull it out.
- Practice a stitch on the fabric scrap before touching the garment.
- Turn a sweater inside out and pull a snag through with a blunt needle.
- Keep spare buttons in a labeled envelope with the garment name.
- Trace a good pocket onto scrap paper before replacing a torn one.
- Use clips to hold thick seams together where pins distort the fabric.
- Check the stretch direction of a patch against the original fabric.
- Put a safety pin on a drawstring end to guide it through the channel.
Kitchen · 10 tips
- Use a damp cloth under a cutting board that slides.
- Write the opening date on jars with removable tape.
- Put small lid sizes together upright in a spare bin.
- Keep a small basket for pantry packets you want to use first.
- Measure the inside of drawers before buying organizers.
- Save the original cooking directions when decanting dry goods.
- Use a rimmed tray to group bottles that leave sticky rings.
- Keep a reusable shopping list clipped inside the pantry door.
- Line up duplicates behind the open package so you can see what to use next.
- Put meal ingredients together on one tray before you start cooking.
Cleaning and care · 10 tips
- Use a clean dry paintbrush to loosen dust in carved furniture.
- Fold a cleaning cloth into quarters so you can switch to a clean face.
- Test a cleaner on a hidden spot and let it dry before treating the whole surface.
- Read a fabric care label before using water or solvent on upholstery.
- Blot a spill with a clean white cloth so you can see what is transferring.
- Wash removable vacuum filters only when the maker says they are washable.
- Use a soft brush to clear dry crumbs from drawer corners before wiping.
- Take a photo of appliance settings before removing washable parts.
- Keep a separate cloth for glass so residue from other surfaces stays off it.
- Start with dry dusting on wooden surfaces to avoid making muddy streaks.
Small repairs · 10 tips
- Press a screw into a labeled piece of cardboard to remember where it goes.
- Photograph a drawer slide before taking its hardware apart.
- Use a tray with a rim to stop small screws rolling away.
- Check that a screw sits straight before tightening it.
- Find the replacement hinge by matching its hole spacing as well as its shape.
- Use painter’s tape to mark the original position of a drawer pull before removing it.
- Add a felt pad to the inside corner of a cabinet door that taps the frame.
- Lay a paper template on a drawer front to check handle placement.
- Keep the old fastener for comparison when shopping for a replacement.
- Use a flashlight held low to spot debris or a raised screw in a drawer track.
Reuse and organization · 10 tips
- Cut a cereal box into a shallow divider for paper packets.
- Bundle matching bed linen inside one pillowcase.
- Use a paper outline to test where a storage box will fit.
- Store spare hooks and their matching screws in the same labeled bag.
- Keep a list of household filter sizes near the appliance manual.
- Put a small tray by the door for items you need to return.
- Use a binder clip to keep the ends of spare unplugged cords easy to find.
- Use an old sheet to wrap clean seasonal linens before storing them.
- Measure the doorway and the tightest turn before bringing home secondhand furniture.
- Keep a small mending basket where you actually sit down to sew.
Clothes and fabric
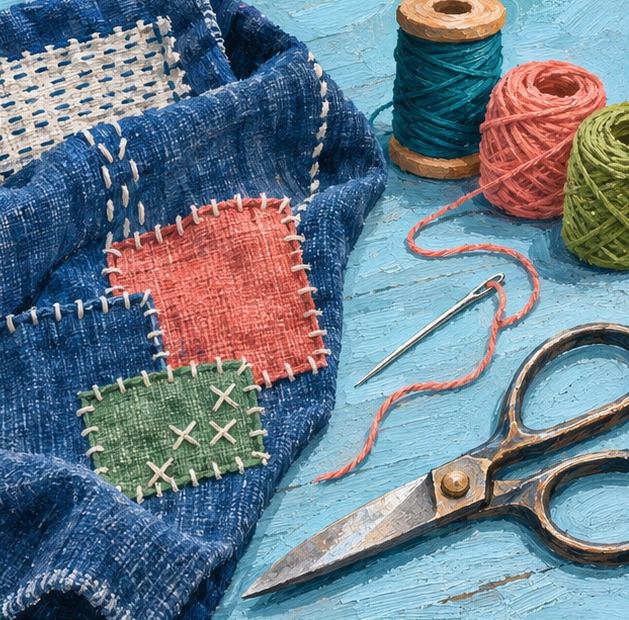
Patch a tear before it spreads
Gather Fabric scrap, needle, thread, scissors and clips.
- Cut a patch that extends beyond the weak fabric.
- Clip it behind the tear and stitch around the edge with short stitches.
- Add rows through the worn area and give the patch a gentle tug.
Sew a button that has room to move
Gather Needle, thread and a toothpick.
- Mark where the old button sat and lay a toothpick across the new button.
- Sew over the spacer, then pull it out and wrap thread around the stitches beneath the button.
- Tie off inside and check that the button passes through the hole easily.
Get a stuck zipper moving
Gather Tweezers and good light.
- Stop pulling and check both sides of the slider for trapped fabric.
- Ease the fabric away while gently backing up the slider.
- Test a short run before closing it all the way. A missing tooth usually calls for replacement.
Shorten a loose hem
Gather Needle, thread, clips and a ruler.
- Match the fold to the intact hem and clip it in place.
- Take small stitches through the fold and catch only a thread or two of the outer fabric.
- Check the length and flex the seam gently before wearing.
Around the house
Tighten a wobbly drawer pull
Gather A screwdriver that fits the screw head.
- Open the drawer and hold the pull steady from the front.
- Tighten from inside until snug. If the screw keeps spinning, check for stripped threads or a damaged hole.
- Open and close the drawer several times to check the fit.
Make a door stop squeaking
Gather A cloth and a lubricant labeled for the hinge.
- Wipe away dust and protect the floor with a rag.
- Apply a small amount as the label directs and swing the door slowly.
- Wipe excess from the hinge and test again.
Get a drawer to slide smoothly
Gather A cloth, flashlight and screwdriver.
- Empty the drawer and look for debris or a screw sticking into the track.
- Clean the track and snug any loose screws you can reach.
- Test the drawer empty first, then reload it evenly.
Keep a rug corner from curling
Gather A rug pad or grippers suitable for your floor.
- Lift the rug and clean and dry the floor underneath.
- Fit the pad or gripper according to its directions.
- Check that the edges lie flat and that the rug stays put underfoot.